How to visualize an image map so you can debug it
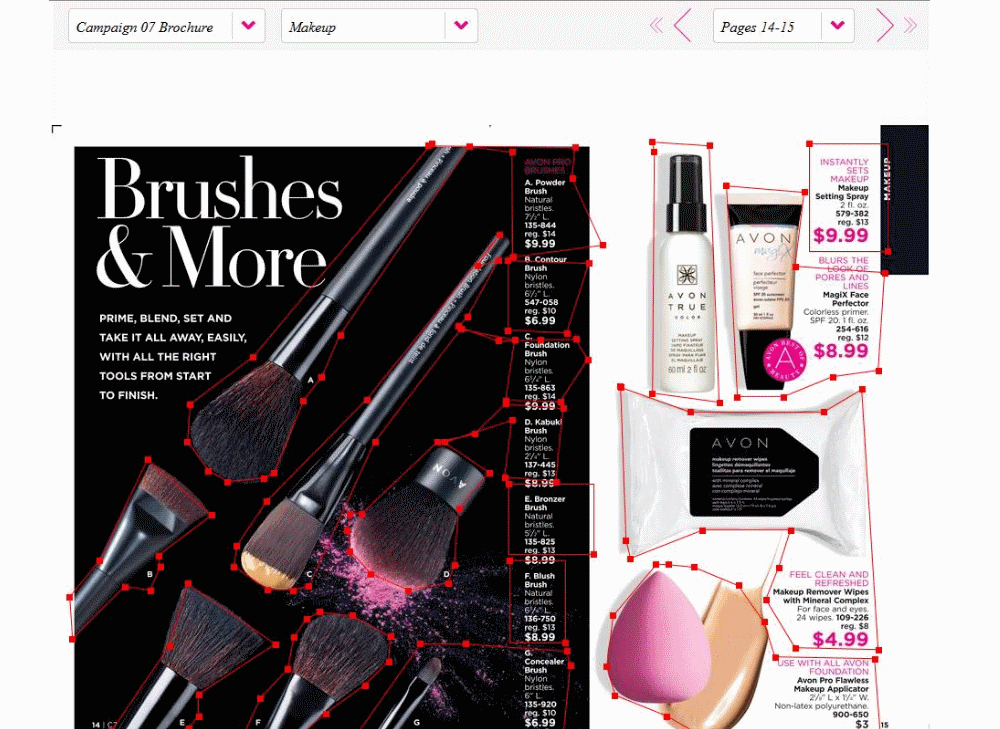
Image maps are a handy way to add clickable zones to your images. When creating an image map from scratch most people would fire up their image editor of choice and work out the click zones using the editor.
This can be ok when creating an image map from scratch but if you have to troubleshoot an image map issue or if you need to 'see' the clickable zones that really isn’t a workable solution.
Luckily there is a very handy browser extension for Firefox call Image Map Editor that lets you view your image map coordinates inside the browser itself. You can also create new maps using this tool which means you can just copy/paste the generated output back into your html code.
Just open Firefox and head over to https://addons.mozilla.org/en-US/firefox/addon/ime/ to install the extension.

Once installed, navigate to your website where you have an existing image map setup and click on the extension icon in the top right corner of the browser and select 'Edit'. If you want to create a new image map you'd select 'New' here.

The extension will highlight all <img> tags that contain image maps. Left click on the image you want to see the image map outlines for.
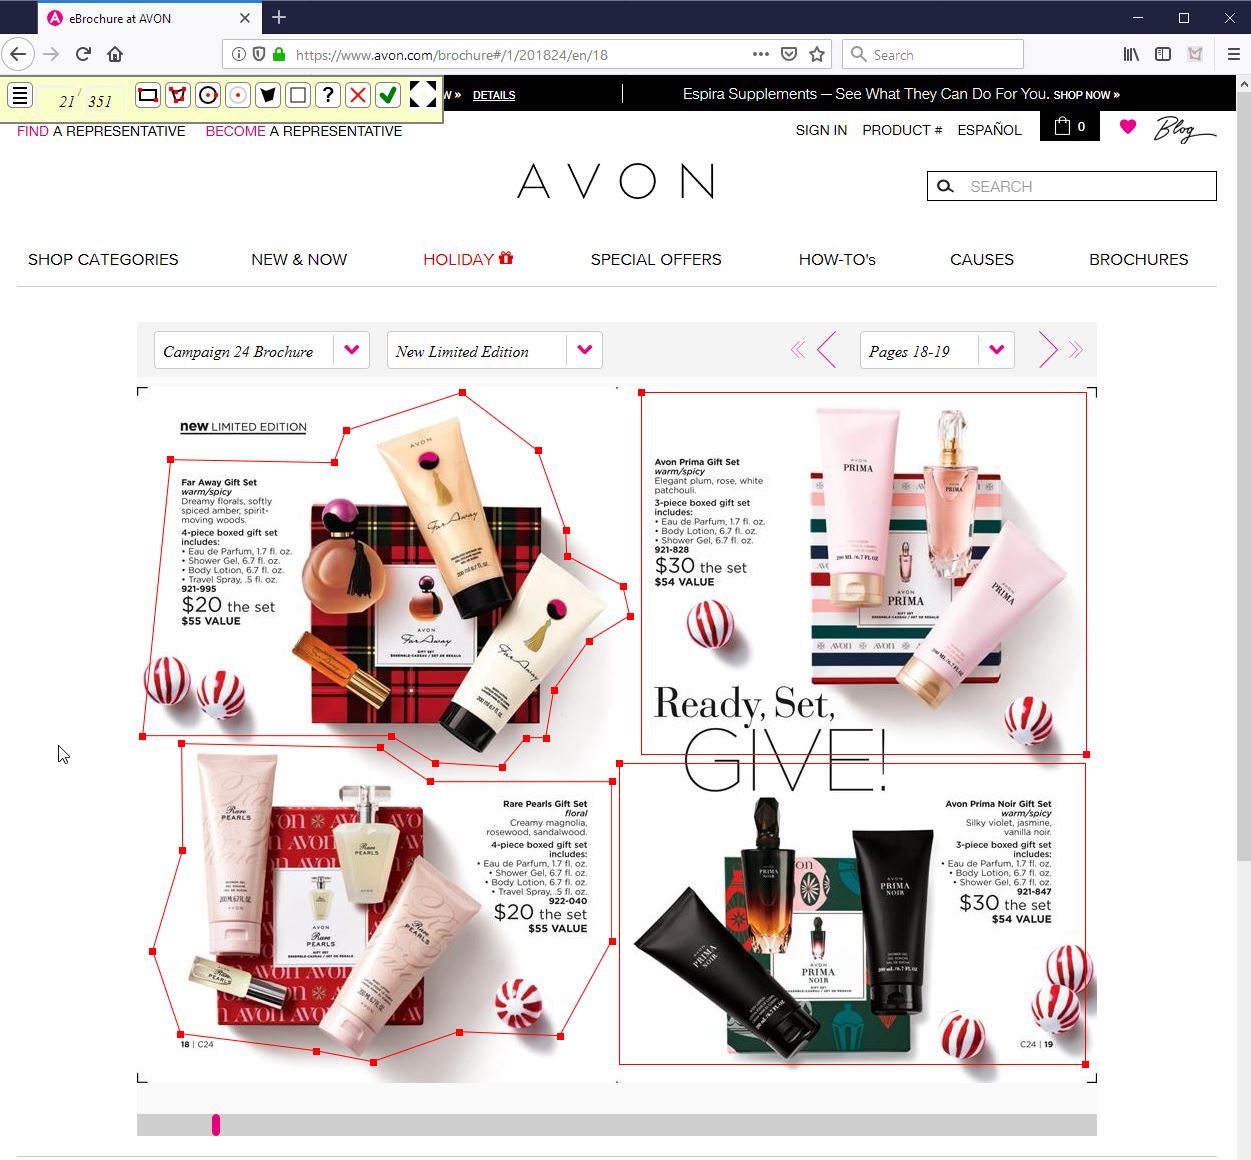
You should now see any image map outlines. This is perfect for highlighting any potential image map problems where co-ordinates are overlapping or if an image map is not positioned where it should be.
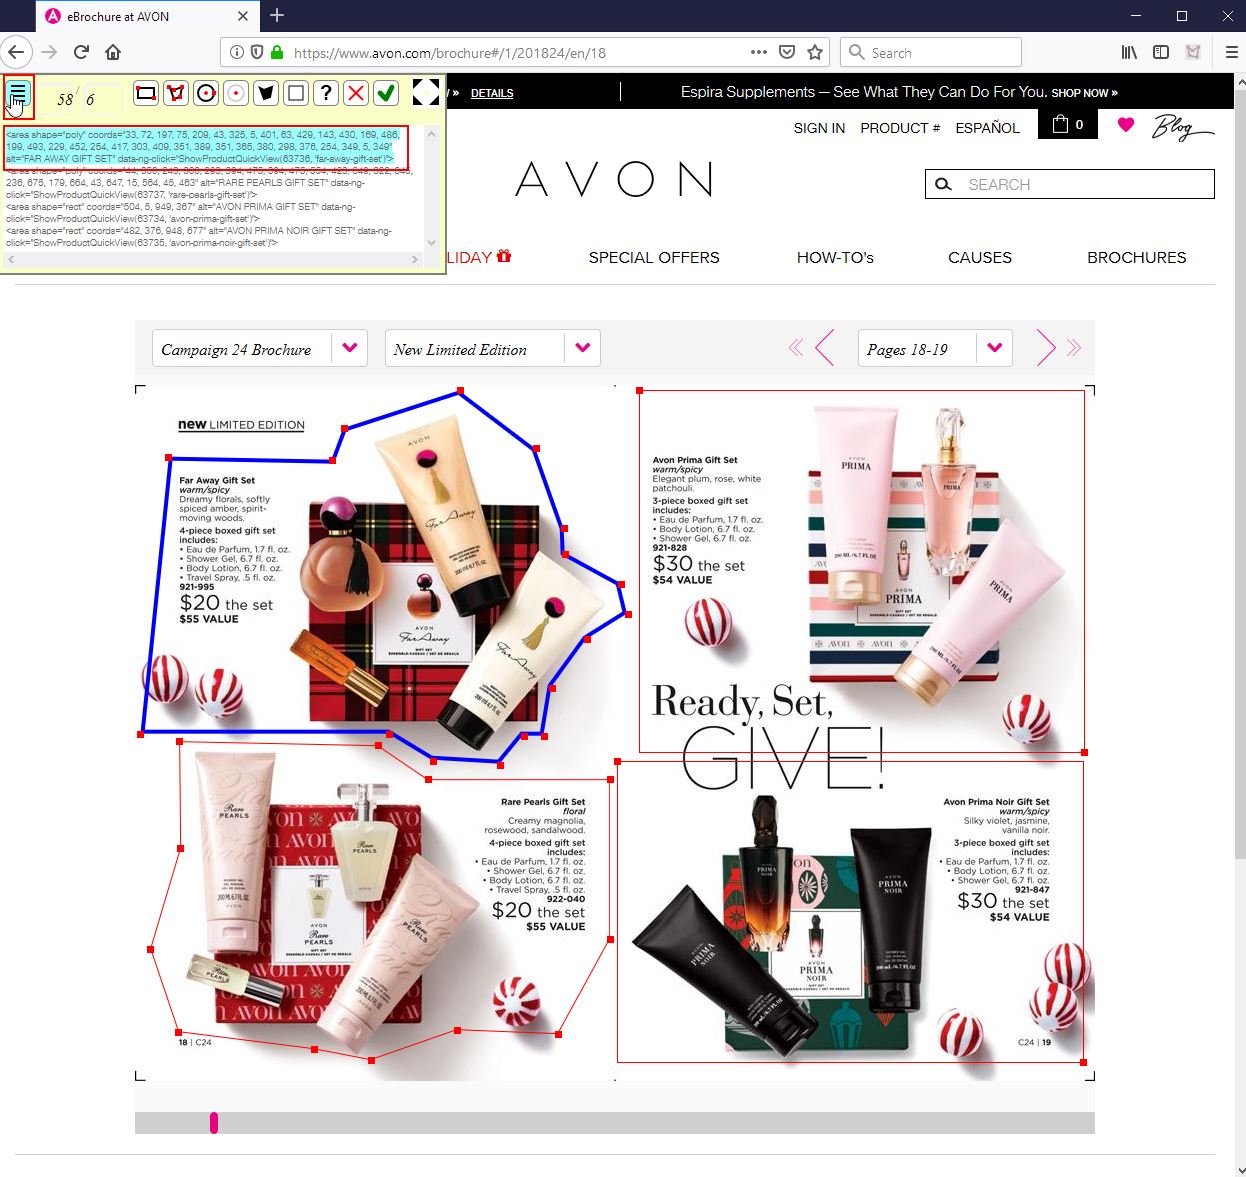
You can easily edit any existing image map by selecting the relevant image map and dragging on one of the points to alter it. You can see the html output from your changes by clicking 3 times on the menu icon - this icon cycles through some other options before presenting this screen for you.


